DIY quick, easy & affordable garden table.
I could have easily bought some plastic thing off the internet, but I believe it is important to practice skills, and have reliable tools. These go hand in hand. So I built this garden table from scratch.

Assuming you already have a drill, head to the hardware store to get the following supplies:
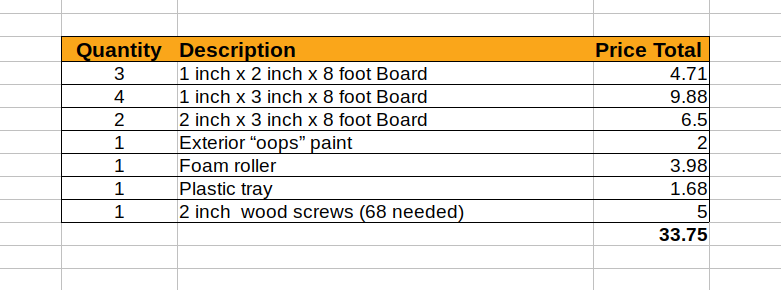
Ask them to cut all the boards in half. Also, ask them to cut two of the 1" x 3" x 8' boards in half again (to make eight 24" sections). This will save you a ton of time!
This table would be a one day project, but it's better to paint the boards with 2 coats of exterior paint the night before (to make it waterproof and mildew resistant) and let them dry overnight.
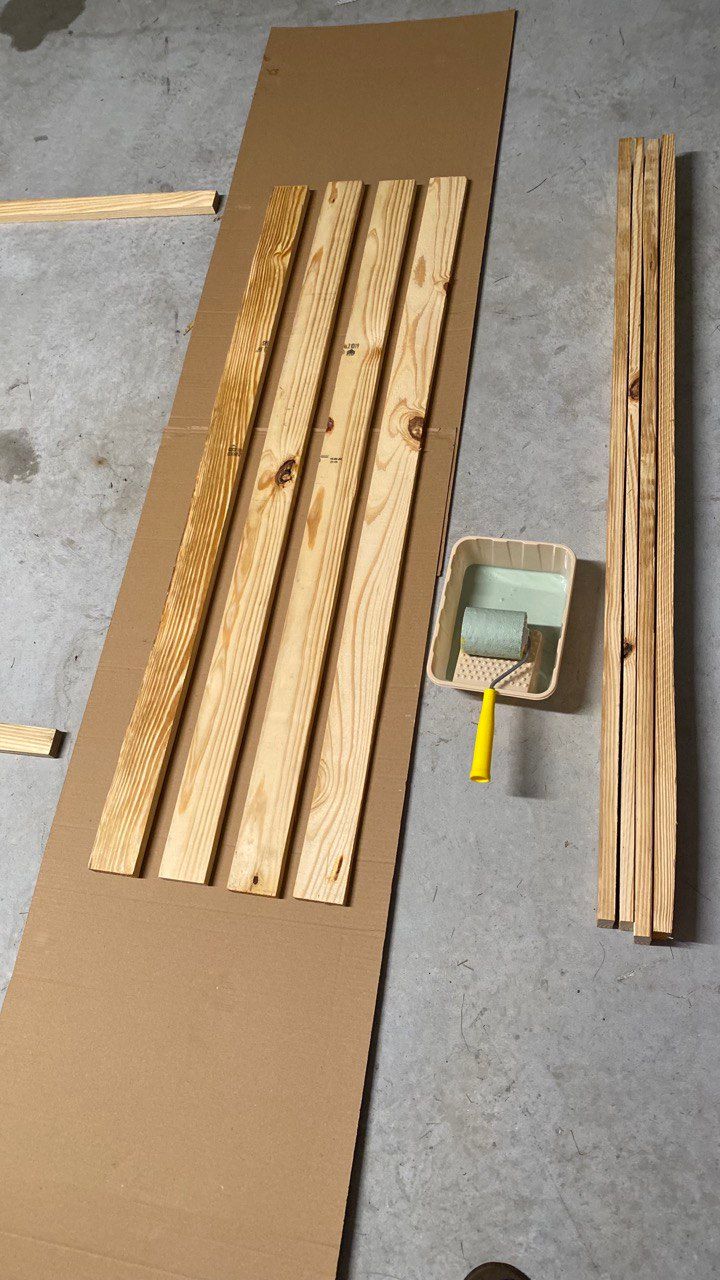

As the first coat was drying, I applied a second. Good enough.
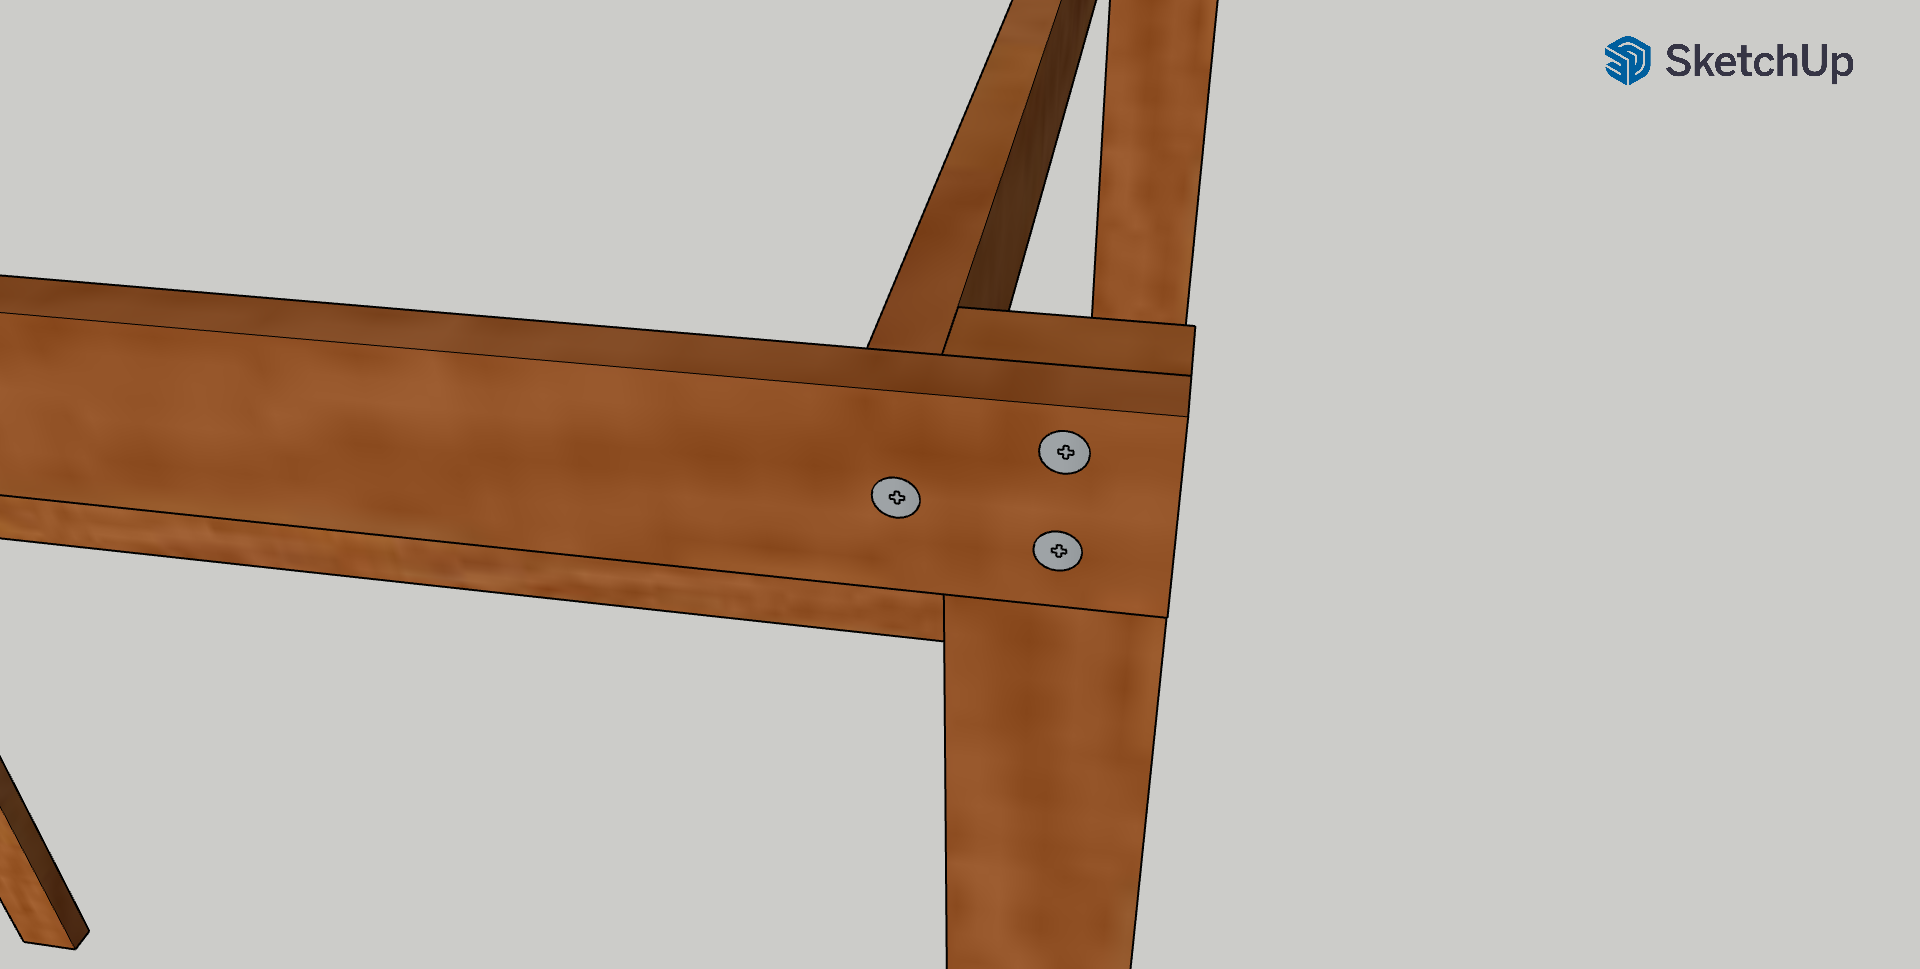
When attaching the boards, you have 3 choices: 1) you can drill pilot holes and then drive in regular wood screws, 2) use wood screws with self-cutting tips, or 3) accept some risk that the board might split when driving in regular wood screws without predrilling.
I just happened to find self-tapping screws in my old box of screws, and I predrilled using my Makita drill set.
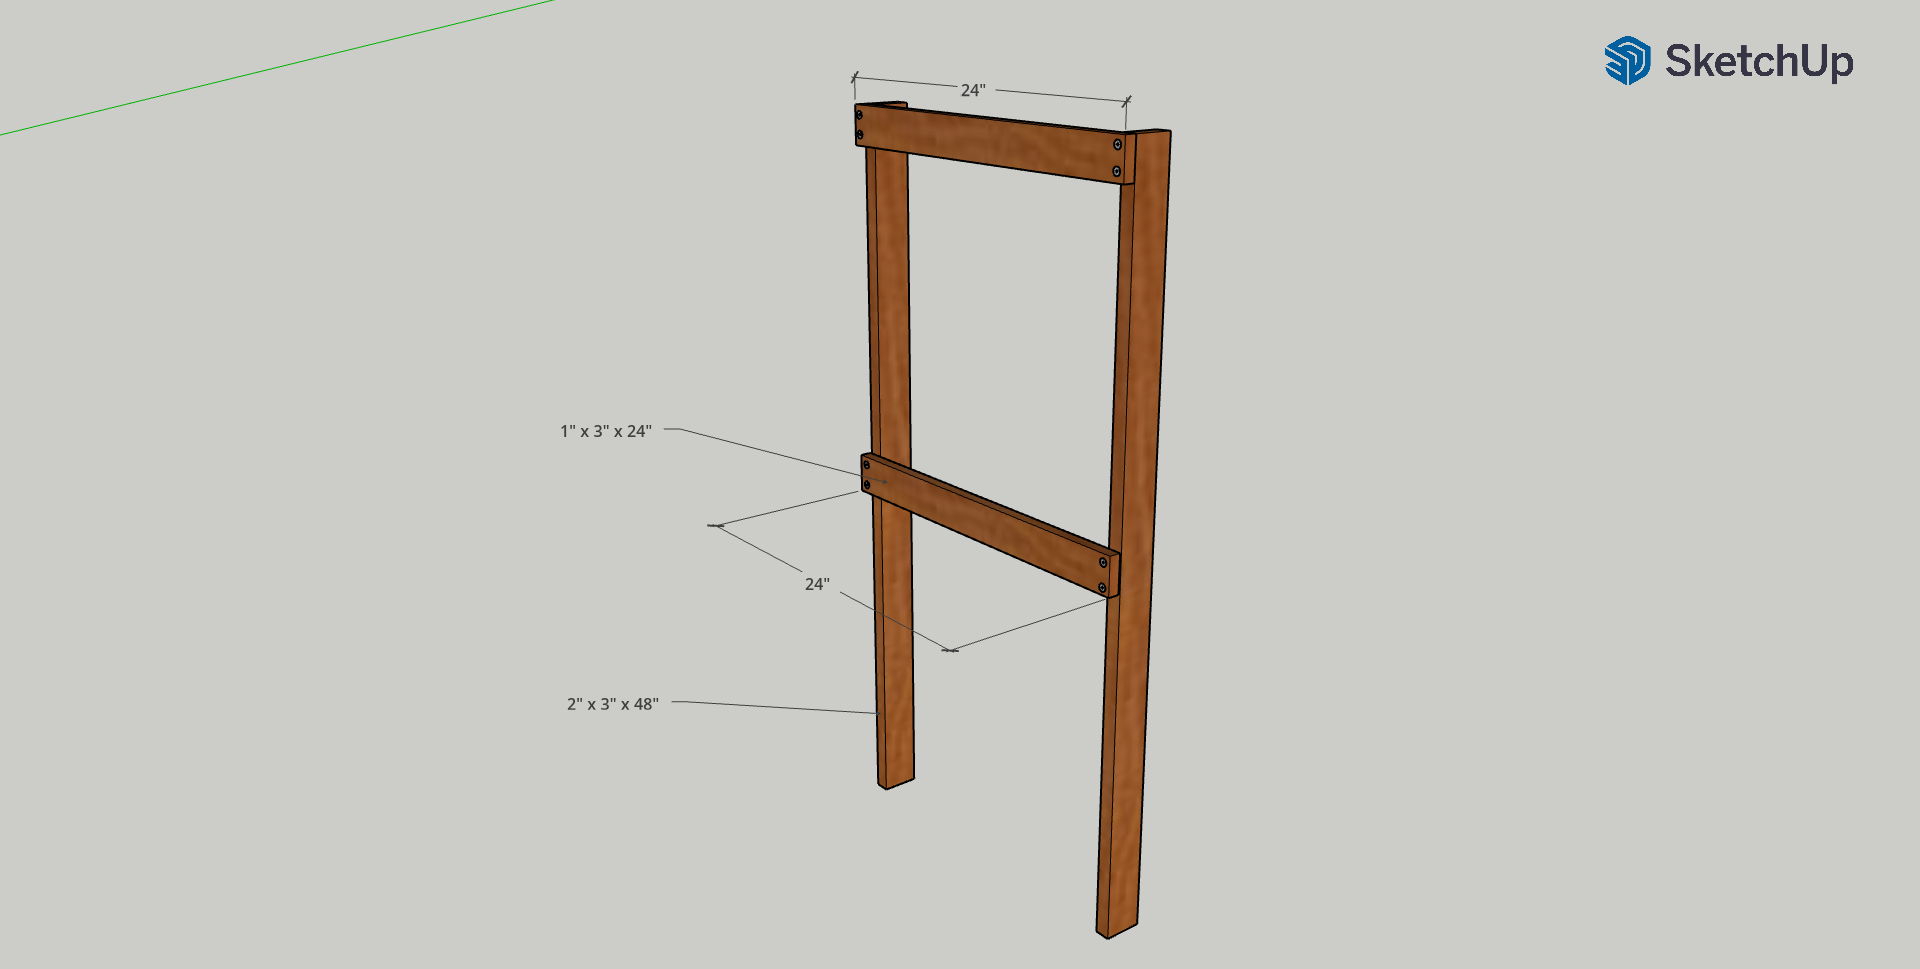
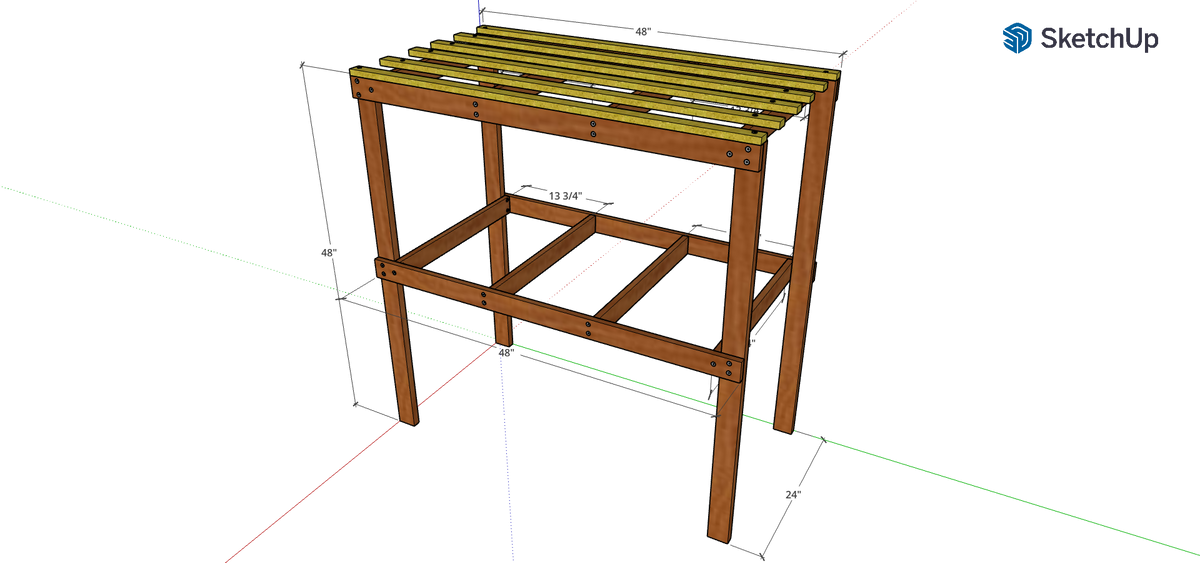
Attach the 2" x 3" x 48" legs with the 1" x 3" x 24" boards as shown in the image above.
Repeat the exact same step above, but for the other side.
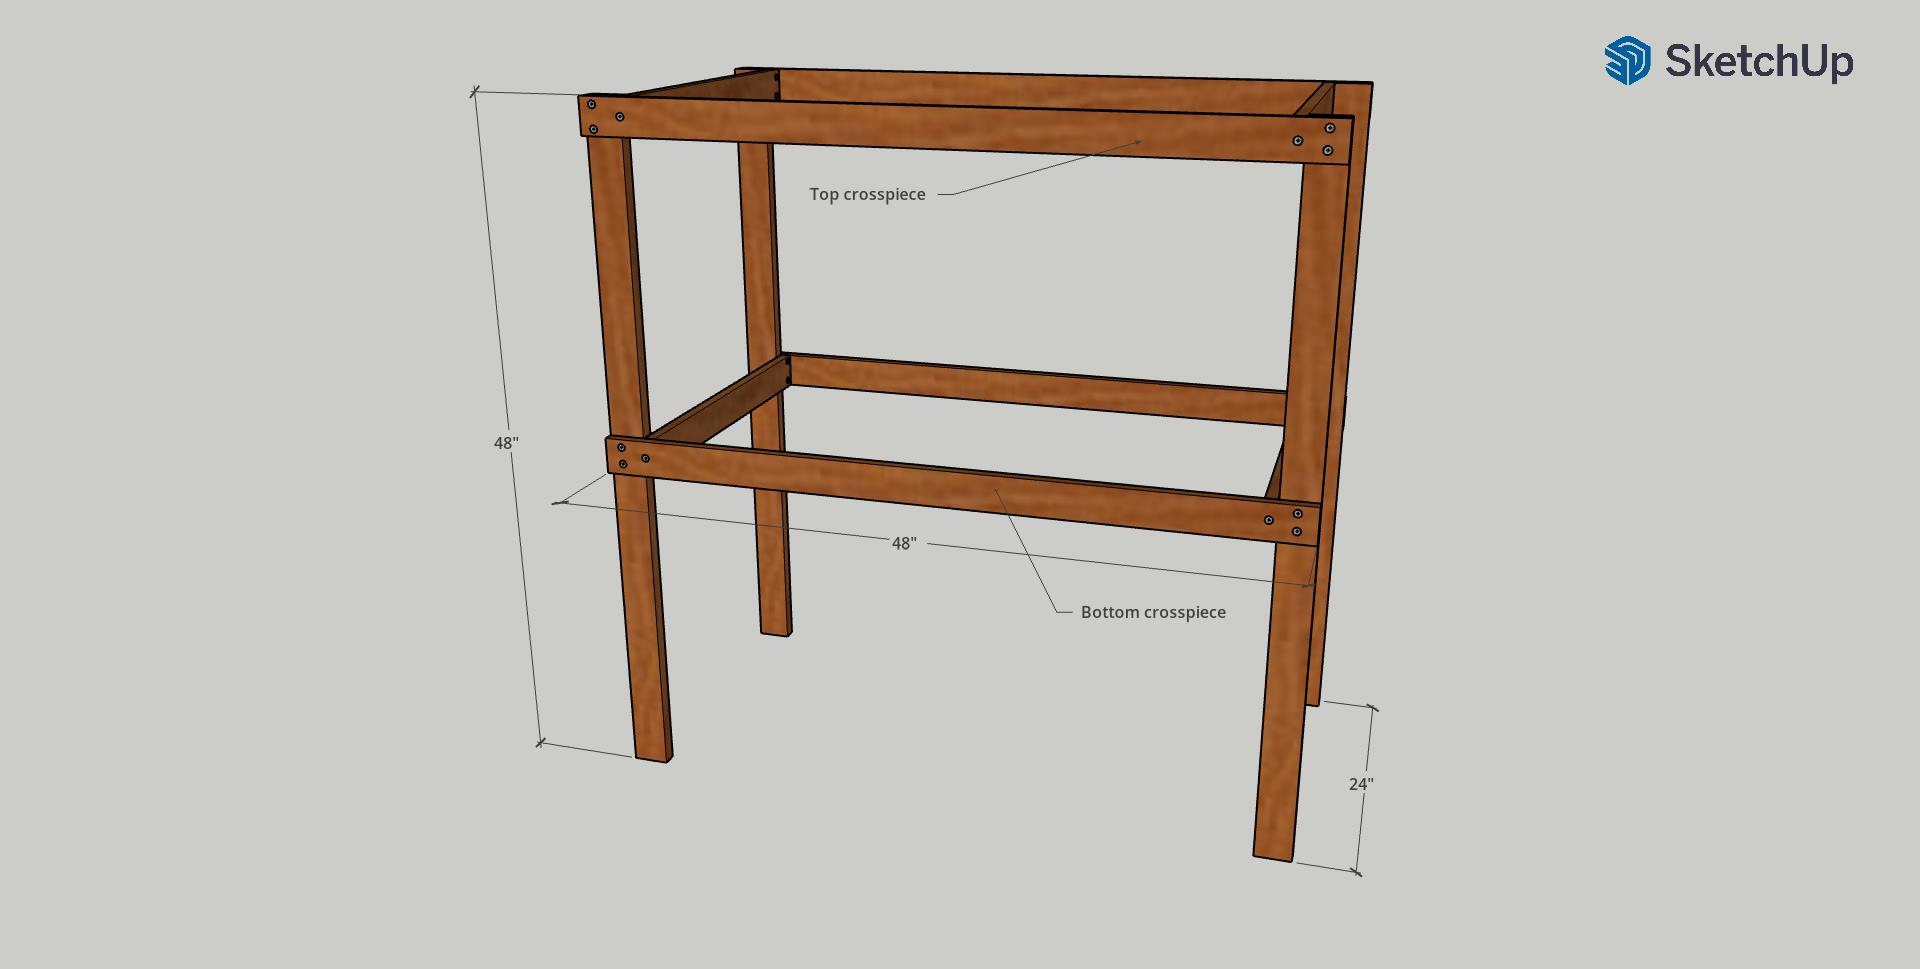
Now attach both of the leg pieces with two 1" x 3" x 48" that we'll call "crosspieces", see below.
As you start building up your table, it's really helpful to either ask for some assistance, or use bar clamps, or vice grips, or C-clamps to mock things up before you start attaching stuff to things.
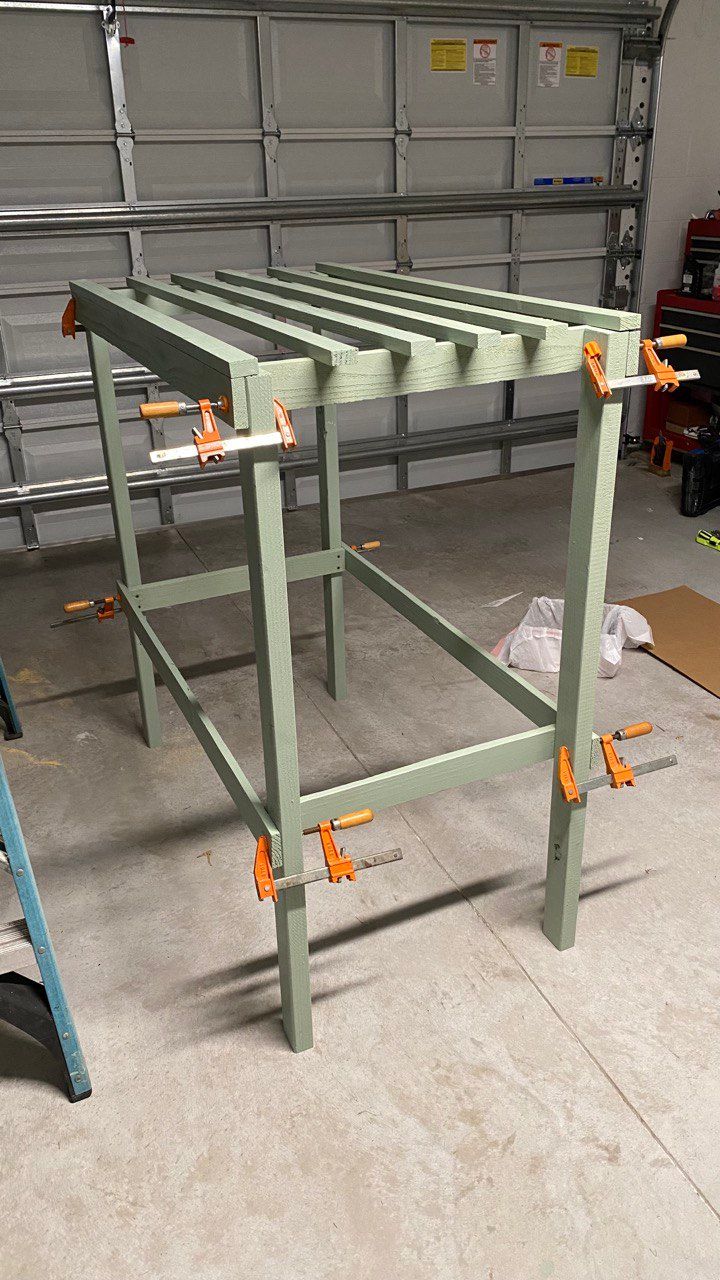
I'm using bar clamps to hold the entire table together. I even put the top boards to see how the finished table will look like. Satisfying.
Now it's time to install the four 1" x 3" x 24" pieces between the crosspieces.
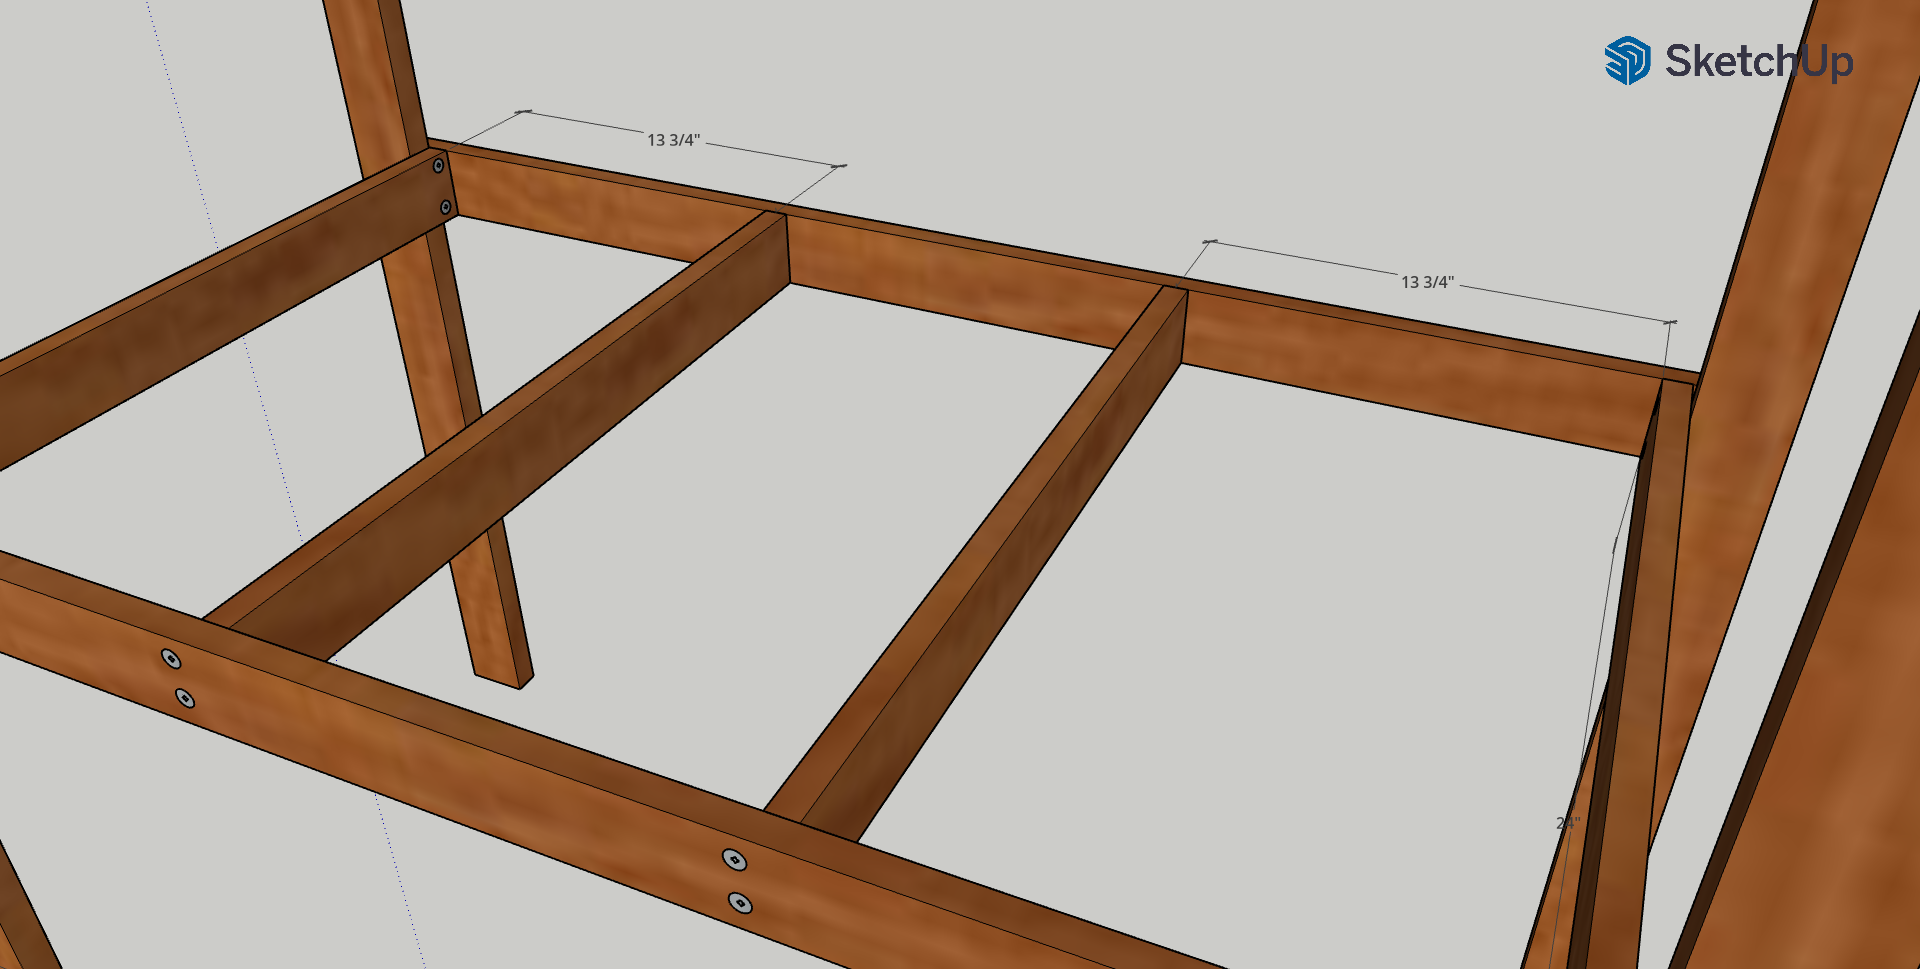
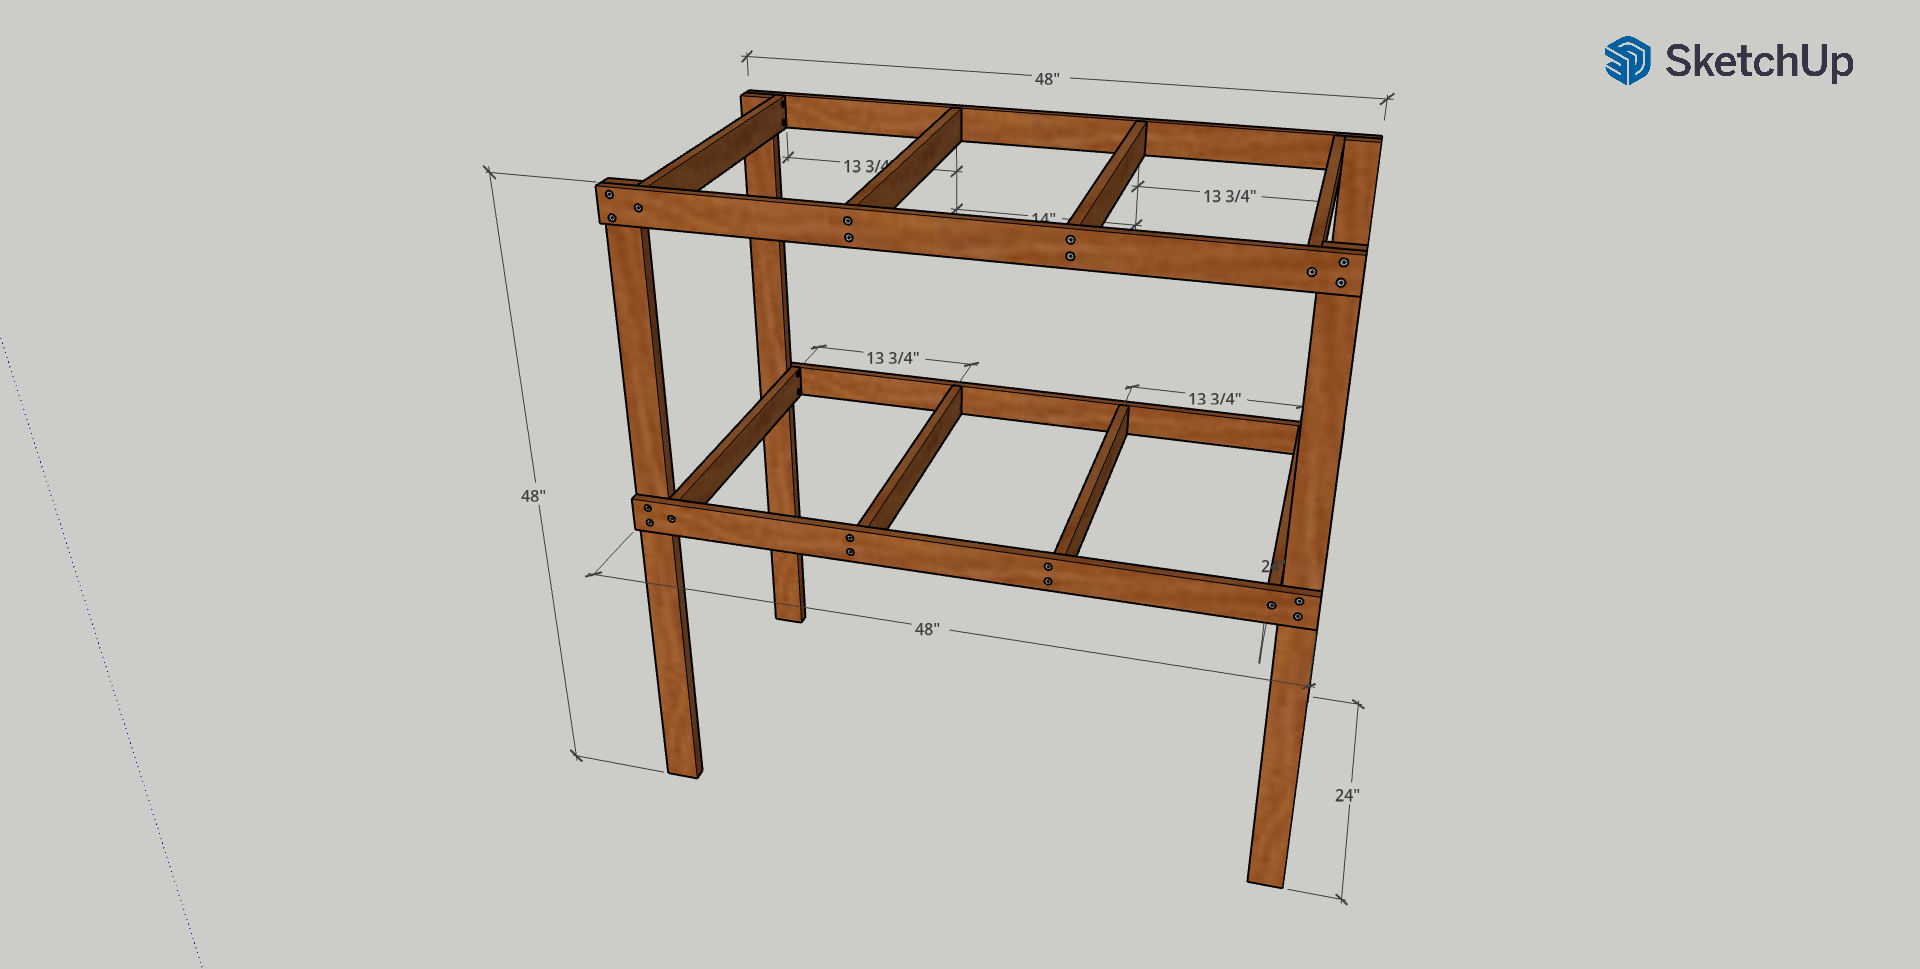
Easiest way is to measure 13 & 3/4" as shown, make a mark, and send 2 screws in on each side of the support. Repeat for the top and bottom crosspieces.
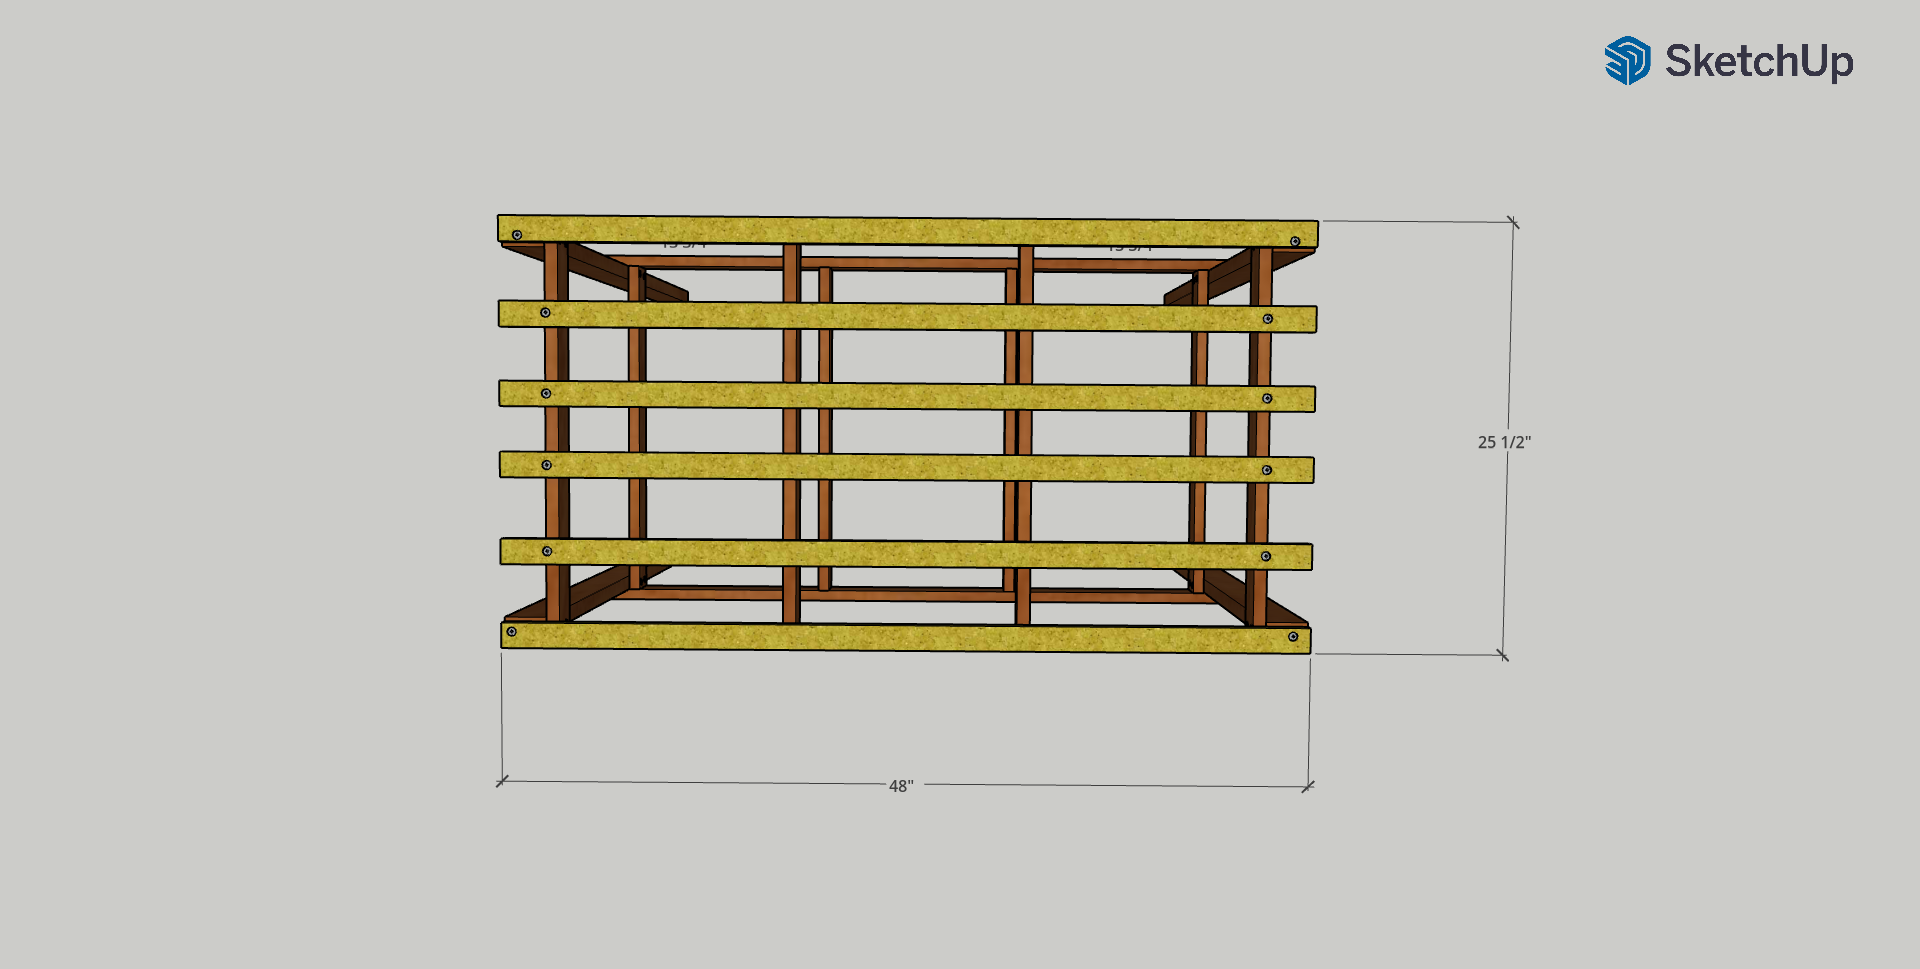
The last thing to do is to add the table top. I'm only going to store garden trays on top, so I went with several 1" x 2" x 24".
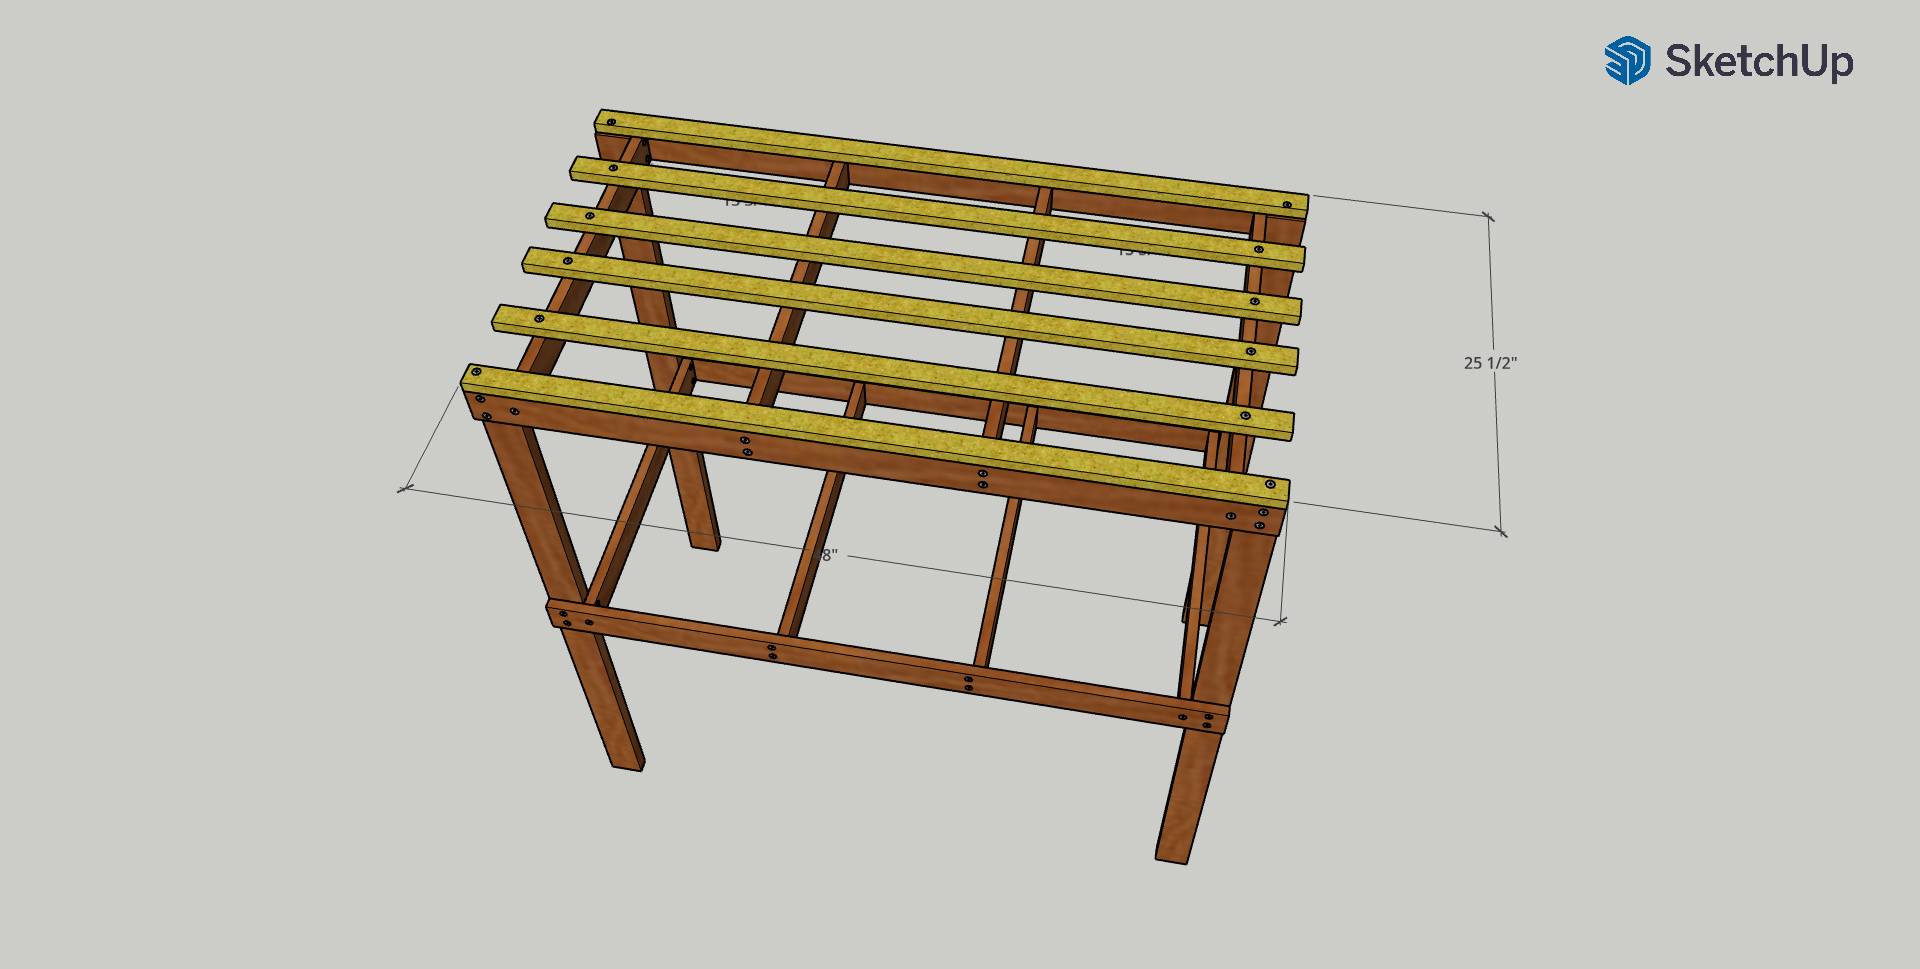
If you prefer to have a regular tabletop, get some 1/2 plywood, and ask to get it cut at the hardware store. You will need 48" x 25 & 1/2".
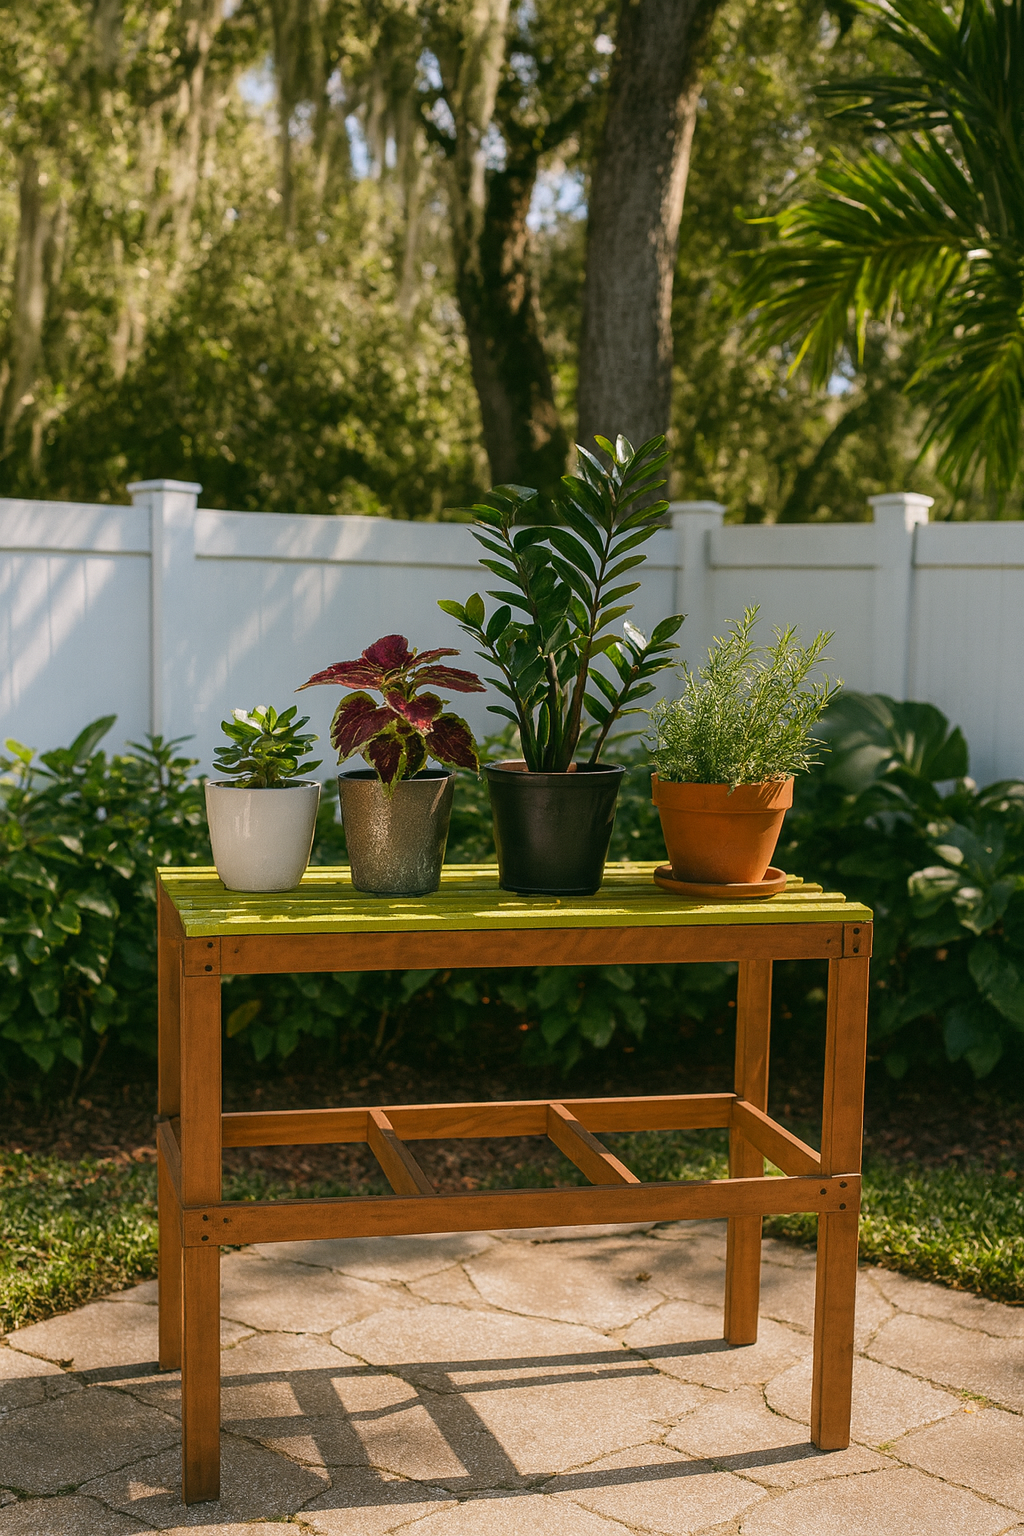
So there you have it: now you have an inexpensive, but very sturdy table for your garden or greenhouse, to store all of you vegetable garden supplies, and your seeding trays.
In future, if you need more storage space, add more 1" x 2" x 24" or plywood to the bottom shelf as well. You can move the table indoors, and hang LED grow lights for seed starting trays.

So, in conclusion, I could have easily bought some plastic thing off the internet, but I believe it is important to practice skills, and have reliable tools. These go hand in hand. So I built this garden table from scratch.
I used a free version of SketchUp to model this table prior to building.
I used my Makita drill to drive in the wood screws, and pre-drill pilot holes (Amazon link).
I also used my Makita circular saw to make a couple of cuts that were missed at the hardware store (Amazon). I've been using this drill & saw for 3 years, and highly recommend Makita tools! I'm continually impressed by the 4.0 Ah battery that it comes with! PS: As an Amazon Associate I earn from qualifying purchases, so thank you for the support and keeping us going!
Take care, enjoy, do good things, God Bless!